3. Create Proof-of-Contribution Job
Every DataDAO must publish a lightweight script called a Proof of Contribution (PoC) job to ensure that contributed data is valid. Now we will fork the template repository and publish your PoC job as a Docker image.
- Fork the PoC Template
- Fork the template repository in GitHub here.
- Open the Actions tab for your fork and enable GitHub Actions (if prompted).
- In a local terminal in your workspace root, download your fork, replacing YOUR_GITHUB_USERNAME:
git clone https://github.com/YOUR_GITHUB_USERNAME/vana-satya-proof-template-py.git
cd vana-satya-proof-template-py
This repo includes:
my_proof/proof.py: your main proof logicinput/: where encrypted files are mountedoutput/results.json: where your PoC scores are writtenDockerfile: defines your containerrequirements.txt: any dependencies for your logic
- Set Your
dlp_id
Open my_proof/__main__.py and update the load_config()
def load_config():
    return {
        "dlp_id": 1234  # ← replace with your actual DLP_ID
    }
That’s all you need to change for now. The USER_EMAIL will be passed automatically by your application when users upload files — no need to change anything else.
- Change Proof Logic
Open my_proof/proof.py and locate the line that sets self.proof_response.valid.
Replace:
self.proof_response.valid = email_matches and total_score >= score_thresholdWith:
self.proof_response.valid = email_matches
For Testing OnlyThis change loosens the validation criteria to help you QA the full contribution flow in the last guide's step.
It allows contributions to succeed as long as the email matches — even if the data doesn’t meet quality thresholds.
Make sure to update this logic later to reflect your real validation requirements before going live.
- (Optional) Test Locally
To test the job locally with sample data, make sure Docker is running and then run:
docker build -t my-proof .
docker run \
  --rm \
  -v $(pwd)/input:/input \
  -v $(pwd)/output:/output \
  --env [email protected] \
  my-proof
You should get a result like this in output/results.json:
{
  "dlp_id": 1234,
  "valid": true,
  "score": 1.0,
  "authenticity": 0,
  "ownership": 1.0,
  "quality": 1.0,
  "uniqueness": 0,
  "attributes": {
    "total_score": 0.5,
    "score_threshold": 0.04,
    "email_verified": true
  },
  "metadata": {
    "dlp_id": 1234
  }
}
This output is what will later be written onchain when your PoC is executed in production. See Data Ingress docs for how it works under the hood.
- Commit Changes
Push your updated PoC to GitHub:
git add .
git commit -m "Set DLP ID for my DataDAO"
git push origin main
Then, go to your GitHub repo → Actions tab, and you’ll see how the build pipeline automatically compiles your PoC into a .tar.gz artifact.
- Get the Artifact URL
Once the GitHub Action completes:
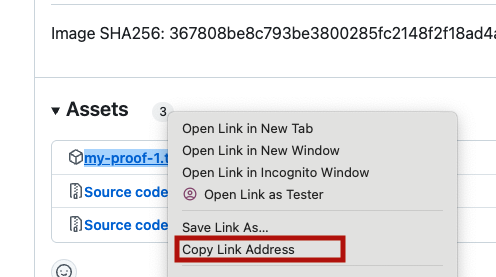
- Navigate to your repo’s Releases section
- You’ll find a
.tar.gzfile — this is your compiled PoC image - Copy the public URL on this file with right click on the link -> "Copy Link Address" and save it for the next step
- Approve Proof Instruction
Now that your PoC is compiled, you need to link it to your DataDAO to ensure only valid contributions get rewarded.
- Go to your
DataLiquidityPoolProxyaddress (from Step 1) on Vanascan (Moksha)- Eg:
https://moksha.vanascan.io/address/<DataLiquidityPoolProxy_Address>
- Eg:
- Open the Contract tab → Find the
updateProofInstructionmethod - Paste the .tar.gz URL you copied from GitHub Releases in the previous step
- Submit the transaction using your
ownerAddresswallet

Updated 3 months ago